
Snake plants (also known as Sansevieria) are one of the easiest houseplants to care for and the good news is, they’re just as easy to multiply! If you have a mature snake plant and want to grow new ones from it, you can simply cut the leaves and propagate them. In this guide, you’ll learn how to cut a snake plant for propagation the right way step by step.
Why Propagate a Snake Plant?
There are a few good reasons to propagate a snake plant:
- You can grow more plants for free.
- It’s a great way to share plants with friends or family.
- It helps refresh an older plant by removing some of its larger leaves.
What You’ll Need
Before starting, gather these tools and materials:
- Sharp, clean scissors or a knife
- A small pot or container (for soil or water)
- Fresh potting mix (well-draining is best)
- Healthy snake plant leaves
- Optional: Rooting hormone
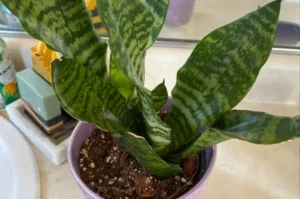
Step 1: Pick a Healthy Leaf
Choose a strong, thick leaf from your snake plant. Make sure it’s green and firm — not yellow, soft, or damaged.
Step 2: Cut the Leaf
Use clean scissors or a sharp knife to cut the leaf near the base of the plant. You can leave it whole or cut it into sections (3–5 inches each). If you cut it into pieces, keep track of which end was the bottom, because roots will only grow from the base end.
Step 3: Let the Cuttings Dry
Before planting or placing the cuttings in water, allow the ends to dry out for a couple of days. Place them in a dry spot away from direct sunlight. This helps form a callus over the cut end, which reduces the risk of rot.
Step 4: Root in Water or Soil
You can now place your cuttings in either water or soil.
Option 1: Water Propagation
- Fill a glass or jar with water.
- Place the bottom end of the cutting in the water (just the tip, not the whole leaf).
- Set the jar in a warm, bright spot.
- Change the water every 4–5 days.
Roots should appear in a few weeks. Once roots are 1–2 inches long, you can plant the cutting in soil.
Option 2: Soil Propagation
- Fill a small pot with cactus mix or any well-draining soil.
- Insert the bottom end of the leaf 1–2 inches deep into the soil.
- Lightly water the soil and place the pot in bright, indirect light.
- Keep the soil just slightly moist—not too wet.
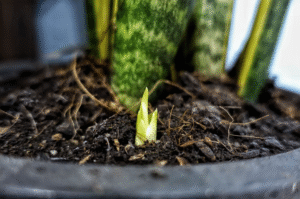
Step 5: Wait for Roots to Grow
Snake plants take time to root. You might start seeing roots in 3–6 weeks. If your cutting is in soil, you may not see the roots, but new leaf growth is a good sign that it’s working.
Step 6: Repot the New Plant
Once your cutting has grown roots (and maybe even a few new leaves), it’s ready for a larger pot. Choose a pot with drainage holes and fresh potting mix. Water sparingly, snake plants don’t like wet feet!
Common Mistakes to Avoid
- Wrong end down: Make sure the bottom end of the cutting goes into the water or soil.
- Too much water: Overwatering can lead to rot. Only keep the soil slightly moist.
- No callus time: If you plant the cutting too soon without letting it dry, it might rot.
Extra Tips for Better Results
- Use a rooting hormone if you want to speed up the rooting process.
- Keep the cuttings in a warm room with plenty of indirect sunlight.
- Patience is key, don’t worry if it takes a few weeks for changes to show.
Conclusion
Propagating snake plants by cutting is simple and fun. With a sharp tool, a healthy leaf, and a bit of care, you can grow beautiful new plants at home. Whether you use water or soil, the process is easy and budget-friendly. Give it a try and enjoy watching your new snake plants grow!


4 thoughts on “How to Cut a Snake Plant for Propagation”
Hi,
Thanks for your fruitful guidance to have new snake plants. I’ll try it.
I would like to know more about issues of plants. Especially snake plant how can I get it.
Thanks for such a lovely information. I want to try it as you advised.
Keep posting such great tips,
Thank you very much
I am a plant lover