Snake plants, also called Sansevieria or “mother-in-law’s tongue,” are popular for their resilience and low-maintenance nature. Despite being hardy, they’re not immune to root rot, a common but treatable problem caused primarily by overwatering and poor drainage. If caught in time, you can absolutely save your plant and help it bounce back to health.
This article will guide you step by step through identifying root rot, treating it, and preventing it from returning — no gardening degree required!
What Exactly Is Root Rot?
Root rot is a condition where a plant’s roots begin to decay due to prolonged exposure to overly wet soil. The excess moisture encourages harmful fungi and bacteria, which break down the roots, eventually starving the plant of oxygen and nutrients.
Common Symptoms of Root Rot in Snake Plants
Watch out for these warning signs:
- Yellowing or drooping leaves
- Soft, mushy stems near the base
- An unpleasant smell is coming from the soil
- Roots that appear black, brown, or slimy
- Soil that stays damp long after watering
Spotting these symptoms early makes it easier to save the plant.
How to Save Your Snake Plant: A Step-by-Step Guide
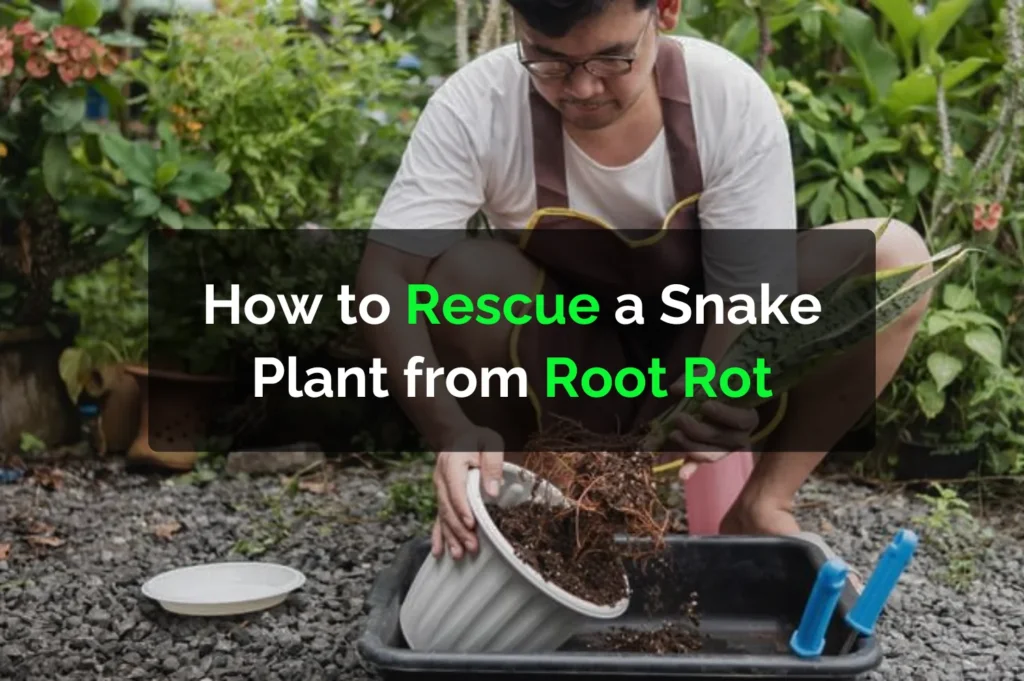
1. Gently Remove the Plant from Its Pot
Carefully lift your snake plant from its container. Loosen the sides by tapping or squeezing the pot if needed, being mindful not to damage the roots further.
2. Clean Off the Soil and Examine the Roots
Rinse the roots under clean, lukewarm water to remove all the old soil. This helps you clearly see which roots are salvageable. Healthy roots will be white to light orange and firm, while rotted ones will be dark, soft, or smell bad.
3. Prune the Damaged Areas
Using a pair of clean, sterilized scissors or pruners, cut away any mushy or blackened roots. Dispose of the infected material carefully to avoid spreading pathogens.
4. Let the Plant Dry
Place the plant in a shaded, well-ventilated area to let it dry for several hours, overnight if necessary. Drying helps kill off any leftover moisture-loving fungi.
5. Prepare Fresh, Well-Draining Soil
Use a soil mix designed for succulents or cacti. If you’re making your own, combine regular potting mix with sand or perlite to boost drainage.
6. Choose the Right Pot
Opt for a container with drainage holes. Clay or terracotta pots are especially good at allowing moisture to escape.
7. Repot and Water Carefully
Place your plant into its new home with the fresh soil. Water lightly, just enough to help the soil settle. Then, hold off on watering again until the soil is completely dry.
Tips to Prevent Root Rot Going Forward
- Water Only When Needed: Always check that the top few inches of soil are completely dry before watering again.
- Use Proper Containers: Avoid pots without drainage holes. They trap excess water and create the perfect environment for rot.
- Pick the Right Soil Mix: Avoid heavy, moisture-retentive soil. Stick to fast-draining mixes.
- Avoid Oversized Pots: Too much extra soil can hold unnecessary moisture. Use pots that match the plant’s current root size.
Frequently Asked Questions (FAQs)
Is it possible to save a snake plant that has lost most of its roots?
Yes, if at least a few healthy roots remain, or if the leaves are still firm, the plant can be revived or even propagated.
How long should I wait before watering after repotting?
Wait at least a week or until the soil feels dry to the touch. This gives any damaged roots time to heal.
Can I reuse the old soil?
No. Discard the old soil as it may still contain fungi or bacteria that caused the root rot.
What if all the roots are gone?
In that case, you can cut a healthy leaf and propagate it in water or fresh soil to grow a new plant.
Conclusion
Root rot might seem like a major problem, but it doesn’t have to mean the end for your snake plant. With prompt action, proper pruning, and thoughtful replanting, your plant can make a full comeback. By understanding what causes root rot and how to avoid it, you’ll be better equipped to keep your snake plant thriving for years to come.